All steps involved in making token-gates, or “Gates”, in NFT Gater.
Create Creation Steps #
Checking Your Gate Limits #
The My Gates page will show you an assortment of account-level gate performance statistics as well as your gate limits. Free accounts can have two gates active at once while holders of the Legendary account token get unlimited gates. Wait for NFT Gater to check your account status and then click on the Create button to get started making web3 utility.
Create Gate #
Creating a new token gate is as simple as filling out the form on the Create Gate page from the My Gates page. There are four basic sections to fill out:
- Basic Details: Public details that allow your gate to be found in the Gate Marketplace search page.
- Triggers: NFT ownership requirements needed for the gate to pass.
- Abilities: Actions to take or perks to provide the consumer for passing the gate.
- Time-To-Live: Options for honoring the same authorization multiple times for easy replay.
Basic Details #
All basic details show up as search options in the Gate Marketplace as well as the Janus API. The Janus API is what allows outside NFT marketplaces to fetch information about the utility associated with your NFTs.
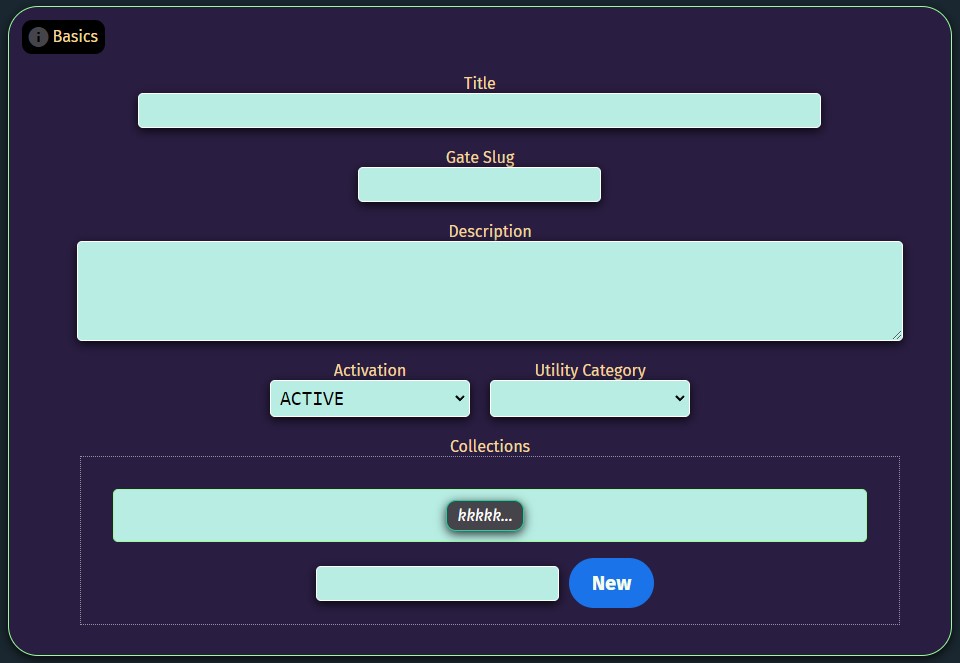
Title: Freeform title for the utility (maximum 120 characters)
Gate Slug: A customizable gate identifier that is helpful in organizing multiple gates onto one page.
Description: A detailed description of the perks or utility the consumer can expect to experience when unlocking the gate (max 250 characters)
Activation: Mark the gate as Active or Inactive, great for creating gates that you want to launch later at a specific time.
Utility Category: Helps your utility be found in the Gate Marketplace by shoppers interested in a specific type of perk.
Collections: Add a gate to a Collection you have made by clicking on its bubble, or add a new Collection on the spot.
Triggers #
The Triggers section provides options for restricting your gate to specific NFT holders.
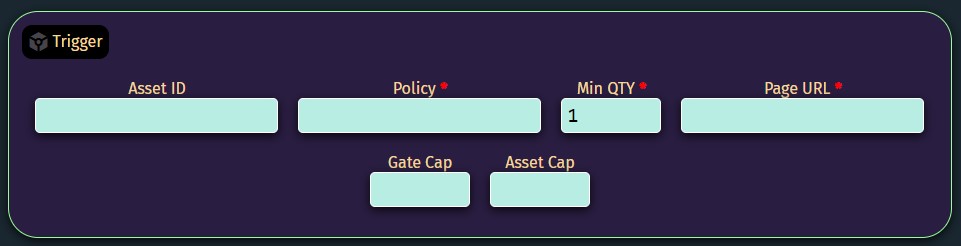
Asset ID (optional): Target one specific NFT instead of the entire series.
Policy: Target any NFT in your collection by using its policy ID.
Min QTY: Require a specific minimum of that NFT to pass.
Page URL: The exact URL of the page you want the utility to work.
Gate Cap (optional): A cap on the total number of times this gate can run.
Asset Cap (optional): Specify whether each individual NFT should have its own usage cap.
Abilities #
Gate types are being added on a regular basis, expanding the types of automations you can effect when a consumer passes through your gate.
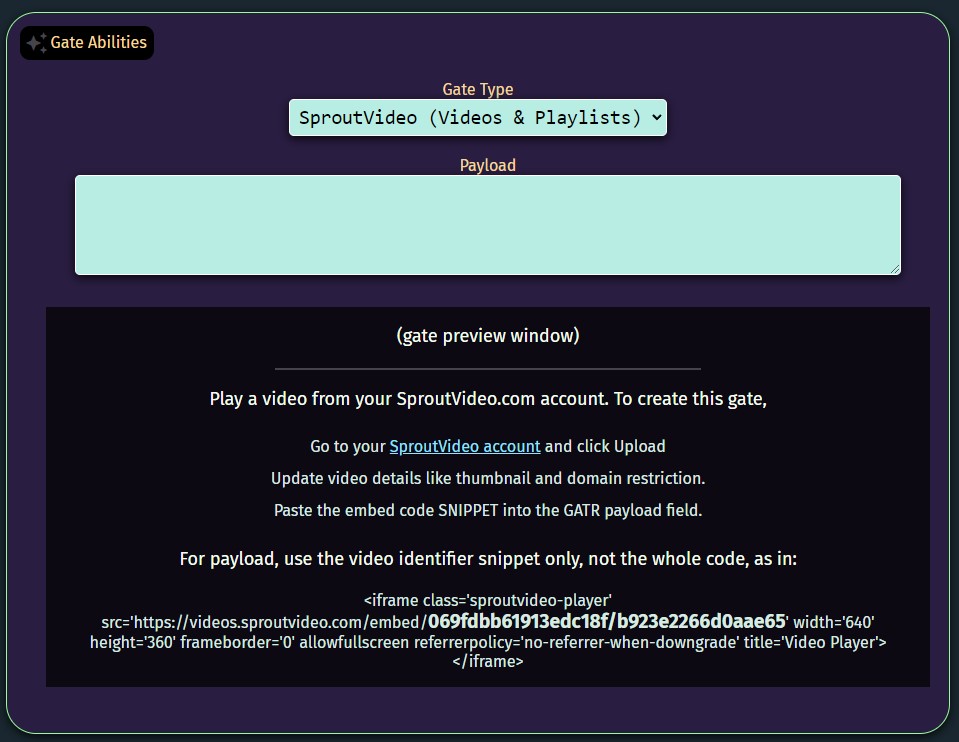
Gate Type: Pick from a drop-down of gate abilities ranging from video, live-streaming, redirection and more.
Payload: The raw payload data that is secured behind your gate trigger conditions. In cases where you are making a video gate, the payload would be a snippet from the video embed script.
The gate preview window will attempt to run your gate payload so that you can be sure it works before clicking Save. The preview window will also include simple instructions for forming the right payload depending on the gate type you are making.
For a list of all gate types along with instructions on filling out the payload for each, see the help page Gate Types.
Time-to-Live #
Time-to-Live options are related to how long you want the consumer to have access to your gate payload after they have been authenticated the first time. This is useful for putting an expiration date on a perk or ensuring that a merchandise-related gate can only be used once.

Days: Number of days from creation that the authorization should automatically expire.
Fetches: Exact number of fetches that the authorization code can perform.
Once you click Save, the gate will go against your account total gate cap. Legendary status NFT holders do not have a cap on the total number of gates that can be created.